Makes
50+ pieces
Ready In:
15mins
Good For:
Treats, gifts or dessert toppers
Ingredients
- 340g caster sugar
- 210ml cream
- 170ml glucose
- 2 pinches of salt
- 200g milk chocolate-chopped
- 60g butter

Step by Step Instructions
Step 1
Home-made confectionary/candy presented in a gift box for someone special is a lovely present to receive either on your birthday, anniversary, Christmas, or any other special ocassion.
Step 2
The first thing to prepare is to line a 30cm x 20cm baking dish with greaseproof paper. If you don’t have one the same size, a similar sized dish will surface. Using a larger dish will produce fudge with less height is all.
Step 3
Wash out a clean medium sized pot with cold water. Be sure to wash up and around the sides of the pot. This process will reduce the risk of the sugar crystalizing.
Empty out the water but don’t dry or wipe the pot.
Step 4
Pour cream and sugar into the pot and over a medium heat, bring to a simmer. Add salt and glucose, increase the heat to high and boil rapidly for approximately 6-7mins.
Try not to stir the mixture too much. The more you stir the firmer the fudge will be.
Step 5
Cook the fudge until lightly golden brown or 120°C. Use a clean probe thermometer to accurately measure the temperature.
If you don’t have a thermometer the old classic method which works perfectly well, is to use a cup of cold water.
When you think the mixture if golden enough, spoon a little into the water and when the mixture forms a firm ball, it’s cooked. If not simply cook more and keep testing.
Step 6
Once the fudge reaches 120°C, remove from the heat and stir through the butter. Place pot back onto a high heat and cook until 120° again. Stir as little as possible during the last cooking stage.
Step 7
Once the mixture reaches 120°, remove from the heat and stir through the chocolate. If you want soft creamy fudge, gently stir through the chocolate. If however your preference is for a firmer style finish, beat the chocolate through vigorously.
Once evenly mixed, pour and spoon the mixture into your lined tin.
Use a clean palette knife or scraper to flatten out the top.
Don’t cover the fudge as it cools and definitely NEVER refrigerate.
Step 8
Leave to cool fully before portioning. I leave mine overnight before cutting.
The fudge will be very easy to portion with your knife sliding easily through the mixture.
Step 9
Store in a dry plastic air-tight container or a freezer bag.
If stored correctly in a cool area away from direct sunlight, the fudge will last for 3-4months. I make fudge all the time to use in my artisan doughnuts.
More Recipes
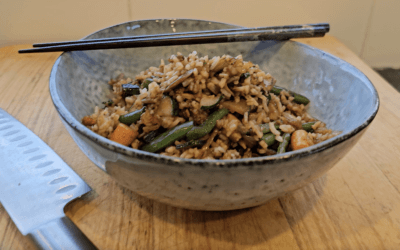
Stir-Fried Chicken with Vegetables
Servings 4Ready In: 10mins Good For: Main, snack, supperIngredients 700g long grain rice-cooked and cold 500g cooked chopped chicken - boneless 90ml vegetable oil 1 lrg carrot- cut into small dice 2 onions- sliced 1 zucchini- split down the middle and thinly sliced...

Crispy Baked Smoked Paprika Potatoes with Onions
Servings 4-5Ready In: 35mins Good For: Side, salad, vegetarian option.Ingredients 700g new potatoes (flour variety, not waxy)- washed 2 onions-peeled 3 cloves garlic-peeled and roughly chopped 40ml olive oil 20g butter 2tsp smoked paprika 1/4 tsp milled black...

Chilli Beef, Cucumber & Asparagus Salad
Servings 4Ready In: 15minsGood For: Brunch, Lunch, Dinner, Pot-LuckIngredients 450g beef mince 1 1/2 tblsp olive oil 1/2 onion- chopped 2 cloves garlic- minced 1tblsp extra virgin olive oil 2 tblsp tomato puree 2 tsp smoked paprika 3 tblsp aioli 2 tsp chilli oil 1 tsp...